Best Gothic Bleeding White Chocolate Candy Apples: 8 Foolproof Steps (Original Recipe)
Ever since I was a kid, Halloween has been my absolute favorite for creative inspiration. If you are looking for the ultimate spooky treat, these gothic bleeding white chocolate candy apples are the perfect way to bring wild vivid imagery to your dessert table! I used to wander through thrift shops, hunt down a single, strange prop or a unique piece of vintage clothing, and let that one item spark an entire costume concept. I would take so much pride in the treasure hunt—piecing everything together to bring the wild, vivid imagery in my head to life. I’m not a sewer, but I am a creator.
That exact same nostalgic, & creative lightning is what drove the concept behind these Gothic Bleeding White Chocolate Candy Apples. As a food blogger and chef, I admit I’m a bit of a perfectionist. I want my creations to be flawlessly smooth, glossy, and exactly as dramatic in reality as they are in my imagination. Sometimes that means taking a little extra time, but looking at these stunning, gothic treats, every single second was worth it.
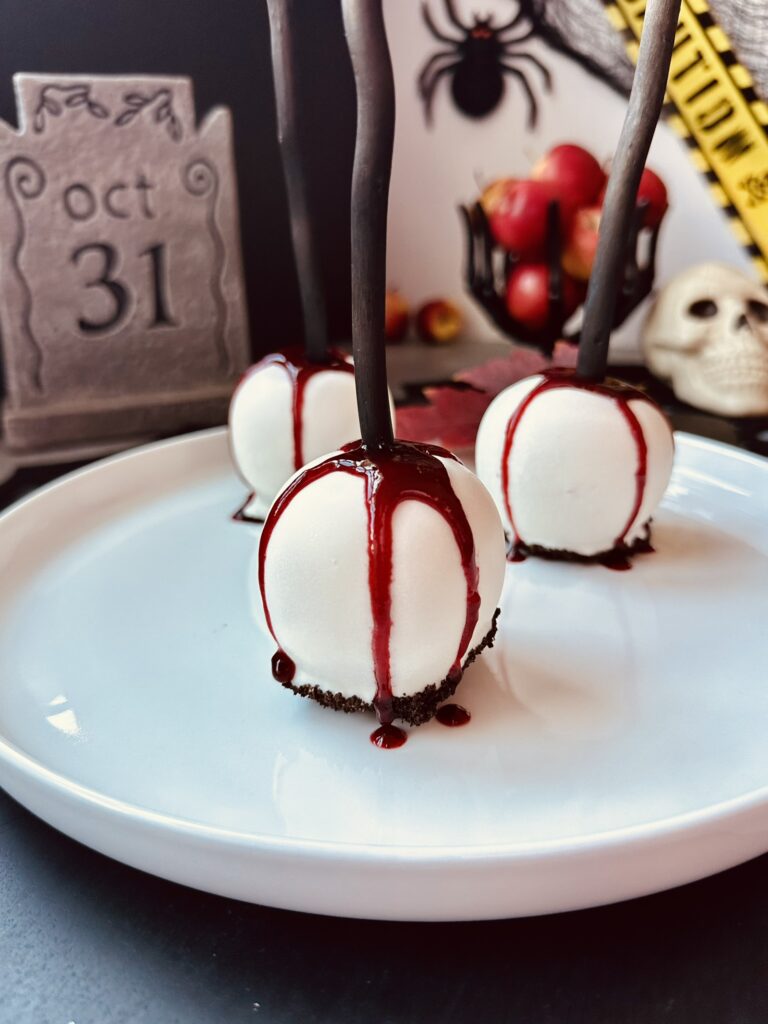
This recipe is the ultimate showstopper for any October gathering if you need the perfect Halloween party treats. By pairing naturally snack-sized Rockit Apples with a rich white chocolate shell, a deep crimson edible raspberry blood recipe, and crunchy chocolate cookie “graveyard soil,” you get a perfect texture and flavor balance. Big apples leave you with too much tart fruit and not enough candy shell, but these tiny apples offer the perfect bite-sized ratio. The crisp, juicy snap of the fruit balances the sweet chocolate shell, while the rich chocolate cookie crumbs add a satisfying crunch, and a hint of lemon juice cuts through the sweet, raspberry-cocoa drizzle.
While the concept is simple, the execution of these white chocolate candy apples requires specific techniques to keep it from turning into a total Halloween horror show! If you just wing it, your chocolate will seize or clump, air bubbles will form underneath, your cookie soil will slide off, and your edible blood will pool into a soggy mess at the bottom. I’m not trying to scare you with this spooky tale- with a few of my tried-and-true chef tips below, you will have a flawless, gorgeous result that is guaranteed to be a Spooktacular success at your Halloween bash. Happy, safe, and spooky crafting!
🛠️Kitchen Tools & Equipment Needed
- 1 Large baking sheet lined with parchment paper
- 1 Small pot + 1 Large heat-safe glass bowl (for your double boiler setup)
- 1 Large Ziploc freezer bag + a rolling pin (to crush cookies)
- 2 Side plates or shallow bowls
- 1 Heat-safe rubber spatula
- 1 Small spoon, squeeze bottle, or clean medicine syringe (to apply the blood drops)
- 1 Clean tea towel or heavy-duty paper towels
- 15–16 Candy apple sticks or decorative dark twig skewers
🛒The Ingredient Setup
- Yield: 15 to 16 miniature candy apples
- The Canvas: 1 pouch naturally miniature snack-sized apples (like Rockit Apples)
- The Ghostly Shell: 1 full block (24 oz) Great Value White Premium Baking Block/Almond Bark (Look for blocks containing palm oil—this is the professional secret to an ultra-smooth, fluid melt!)
- The Secret Thinner: 1 to 2 drops avocado oil
- The Graveyard Soil: 2 cups whole chocolate sandwich cookies (about half a standard package), fillings scraped out and discarded
- The Base Blood: ⅓-½ cup strained seedless raspberry preserves or ½ cup of raspberry coulis
- The Crimson Thickener: 1 teaspoon sifted unsweetened cocoa powder (adjust slightly to reach your desired deep color)
- The Acid: ½ teaspoon fresh lemon juice (a good squeeze from a lemon cheek)
- The Glow (Optional): 2 drops red gel food coloring (Avoid liquid water-based coloring, as it will seize the texture)
👨🍳Step-by-Step Instructions
Step 1: De-Wax and Clean the Apples
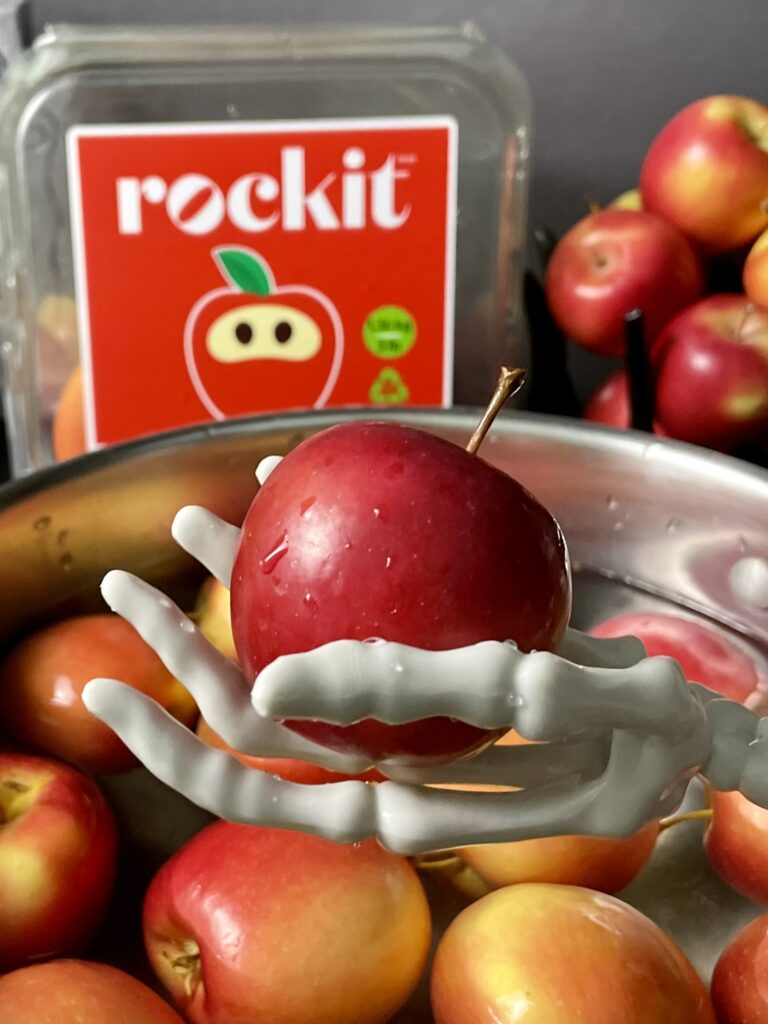
To get a flawless finish, dip each miniature apple into hot tap water—hot enough to clean deeply, but perfectly safe to touch—and hold it submerged for 5 to 10 seconds. Remove it immediately and rub it firmly with a clean paper towel or tea towel. This friction strips away any shiny, food-grade protective wax. Check the texture with your thumb: if it feels slippery, dip and dry it again. You want the skin to feel slightly “grippy” and sticky, paying extra attention to the very bottom and the stem cavity where wax tends to pool. Set them aside on your counter. Next, in order to get a flawless finish, pop the stems off each apple.
👨🍳 Chef’s Tip: Removing this barrier is the secret to getting a thick, flawless coating of caramel or candy to stick without bubbling or sliding off.
Important Timing Note: Only dewax and wash your apples immediately before you plan to dip them. Do not do this hours or days in advance. Once the protective wax is gone, the apples begin to “breathe” and release natural ripening gases. If you coat them after they have sat around unwaxed, those trapped gases will escape into your chocolate or caramel, creating tiny pinhole bubbles and a warty texture. This compromises the candy barrier, causes the coating to break or slide off, and significantly reduces the shelf life of your treats.
Step 2: Stop the Air Bubbles & Prep the Soil
Leave your cleaned apples out on the counter until they are completely 100% dry and cooled back down to room temperature. While they are resting, take your scraped chocolate cookies and place them into a Ziploc freezer bag. Use a rolling pin to firmly bash and roll the cookies until they reach a texture just slightly coarser than sand. Alternatively, you can blitz them in a food processor—just be careful not to overdo it and turn the cookies into dust! You want a fine gravel texture that perfectly mimics graveyard dirt—no giant chunks, but not a fine dust either. Pour the crumbs onto two small side plates, shaping them into a neat pile. Set up your parchment-lined baking tray nearby.
👨🍳 Chef’s Tip: If you use a food processor, pulse the cookies in short 2-to-3 second bursts. This gives you total control over the grind, keeping those distinct, gritty cookie crumbs intact so they look exactly like spooky, realistic graveyard soil on your dessert table.
Step 3: Chop and Melt the Ghostly Coating
Chop your 24-ounce white chocolate block into even pieces using a sharp chef’s knife on a clean cutting board. Set up a double boiler using a pot with just a couple of inches of water on a very low simmer. Place your large, heat-safe glass bowl over the top. Stir occasionally with a rubber spatula until fluid and completely melted, keeping it on a gentle, low-heat setting.
👨🍳 Chef’s Tip: Your glass bowl must be large enough to completely overlap and seal the edges of the pot to trap the steam underneath. If even a single stray drop of condensation or escaping steam leaks into your white chocolate, it will seize up instantly into a ruined, chalky paste.
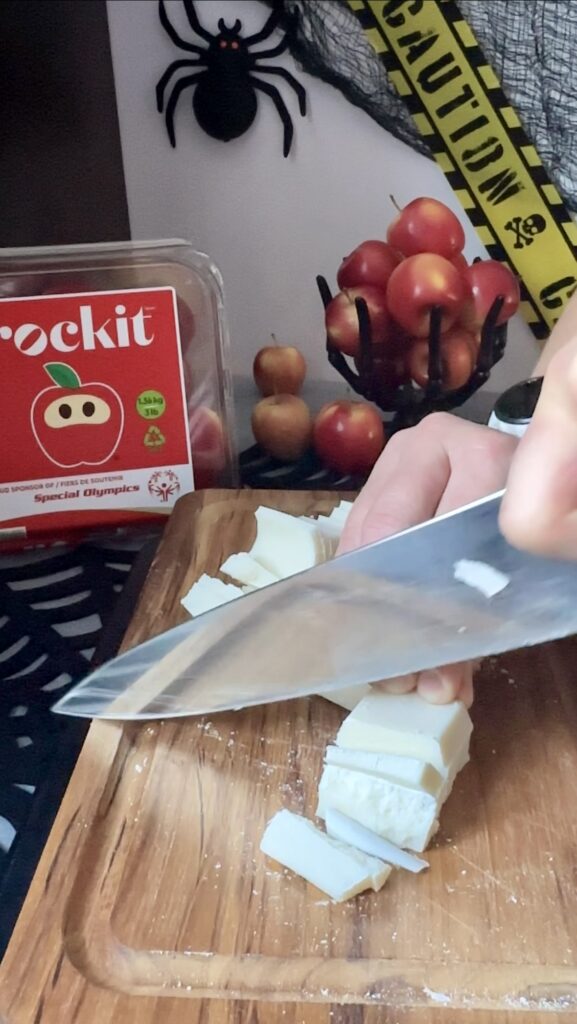

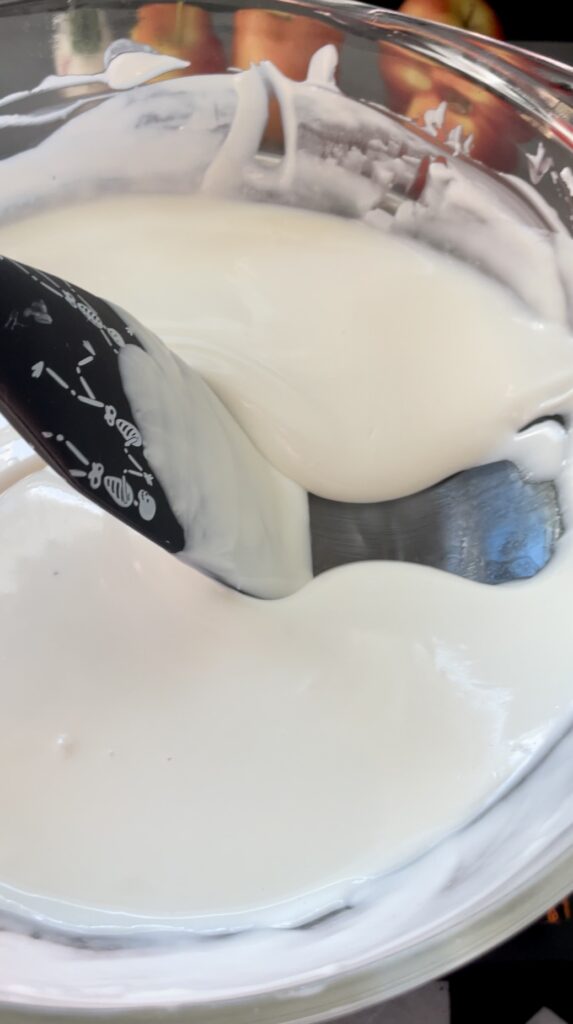
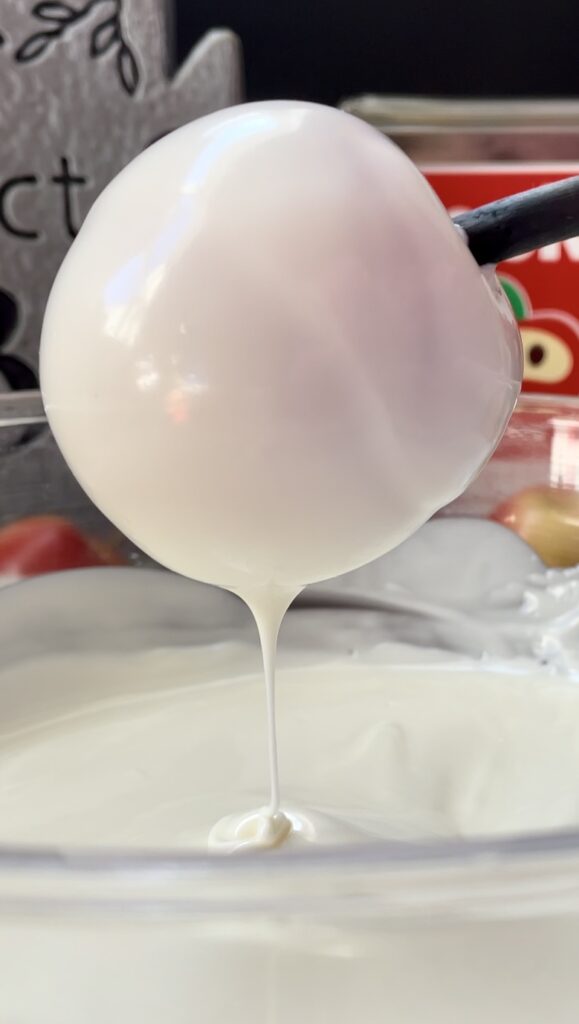
Step 4: Secure the Sticks
While your white chocolate is slowly melting on low, place your dry apples flat on your counter first to see the natural, straight angle it wants to rest on. Insert your candy apple stick or cleaned black twig straight down into the center of the stem cavity at a matching straight angle so it stands straight up.
⚠️CRITICAL STEP: Take a tiny piece of paper towel and firmly dab the top entry hole to soak up any raw apple juices that squeeze out when inserting the stick. If you leave that juice there, the residual moisture will break your chocolate seal and cause the shell to slide off around the stem.
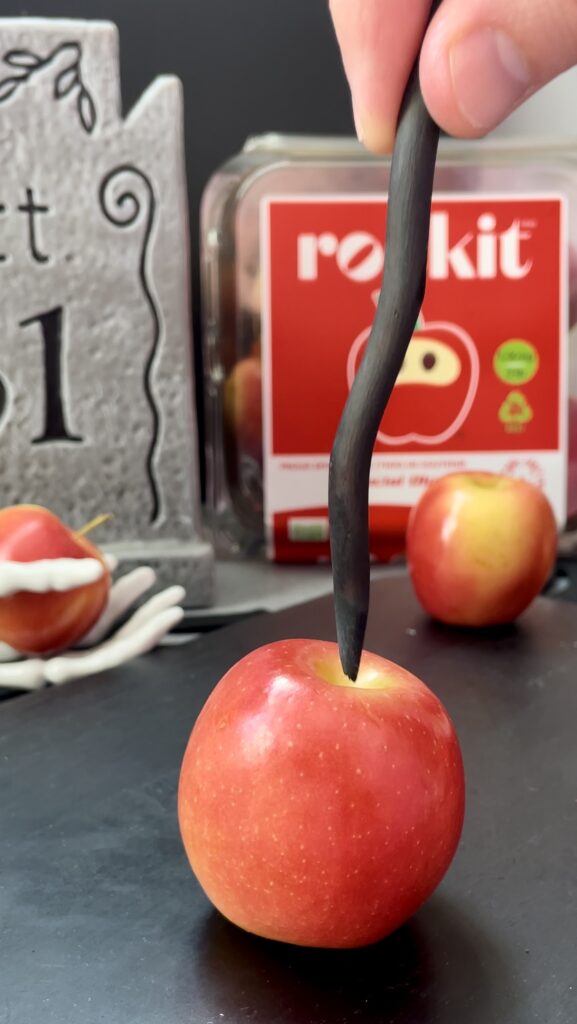
Step 5: Tilt and Dip
Right before dipping, stir 1 to 2 drops of avocado oil completely through the melted white chocolate to give it an extra silky texture. For maximum safety and to prevent steam contamination, carefully remove the glass bowl from the pot and set it on a folded tea towel on your counter, wiping any water drips off the bottom of the bowl.
Tilt the bowl at an angle to create a deep pool of chocolate. Hold your apple sideways by the stick, submerging it into the melted white chocolate focusing on coating around the stem area first (use a spoon if needed to quickly drizzle it in this area only). Then slowly spin the apple, tilting it to ensure the chocolate pools completely into the stem area and fully covers the equator circumference to create a smooth slick surface. Tilt the stick straight upright, lift it out of the bowl, and let the excess stream gently back into the pool. Give it a gentle spin in mid-air to distribute the shell evenly.
Step 6: Apply the Soil and Cure
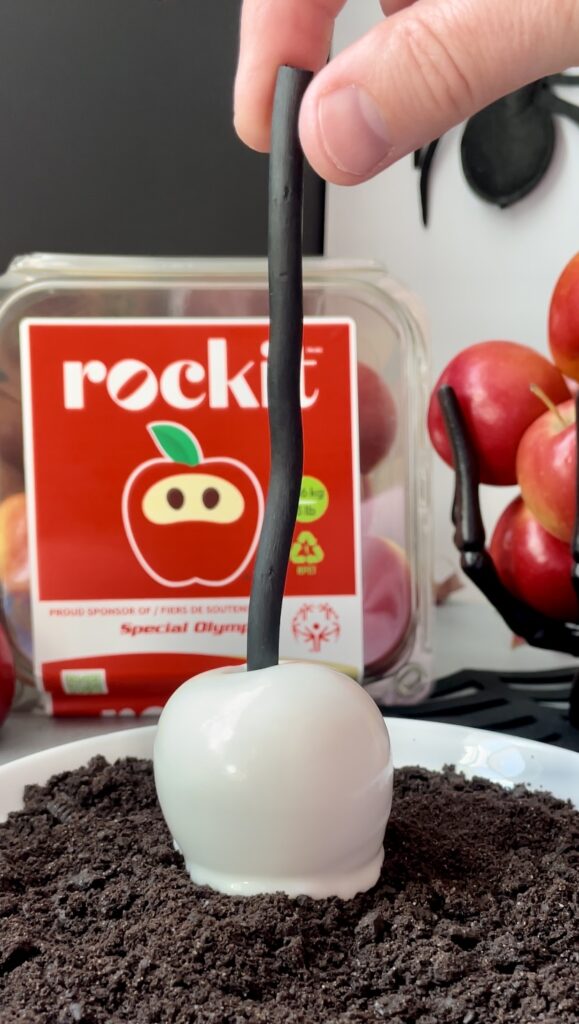
While the white chocolate coating is still completely wet, immediately set the coated apple directly onto your prepared plate of dark chocolate cookie crumbs. The chocolate soil crumbs should cling perfectly to the base. Because the chocolate is still wet, LEAVE IT sitting undisturbed in the crumbs upright for a minute or so to harden enough to be lifted cleanly.
🔍 The Lift Test: You can gently lift the apple up a tiny bit to check your progress. If the crumbed area moves or still appears melty, leave it to rest a bit longer. Once the bottom has hardened enough, gently lift the apple off the plate and place it upright onto your parchment paper-lined baking sheet. Repeat the process for the rest of your apples and allow them to rest undisturbed at room temperature (away from heat and direct sunlight) until the white chocolate shells are fully set and hardened.
⚠️ Note: Total setting time will vary depending on your kitchen temperature and humidity levels, as chocolate does not like humidity!

Step 7: Mix the Crimson Raspberry Blood
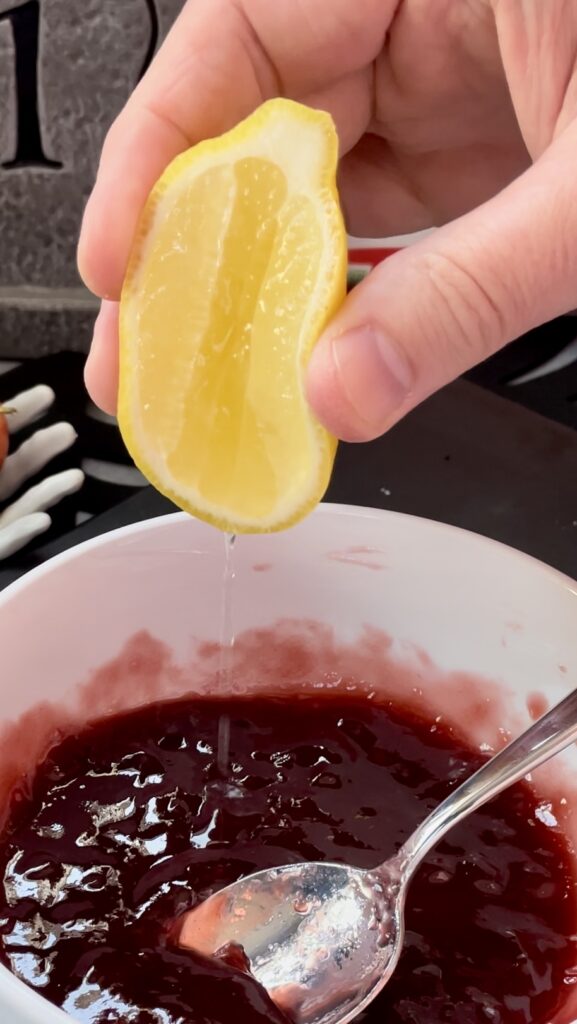
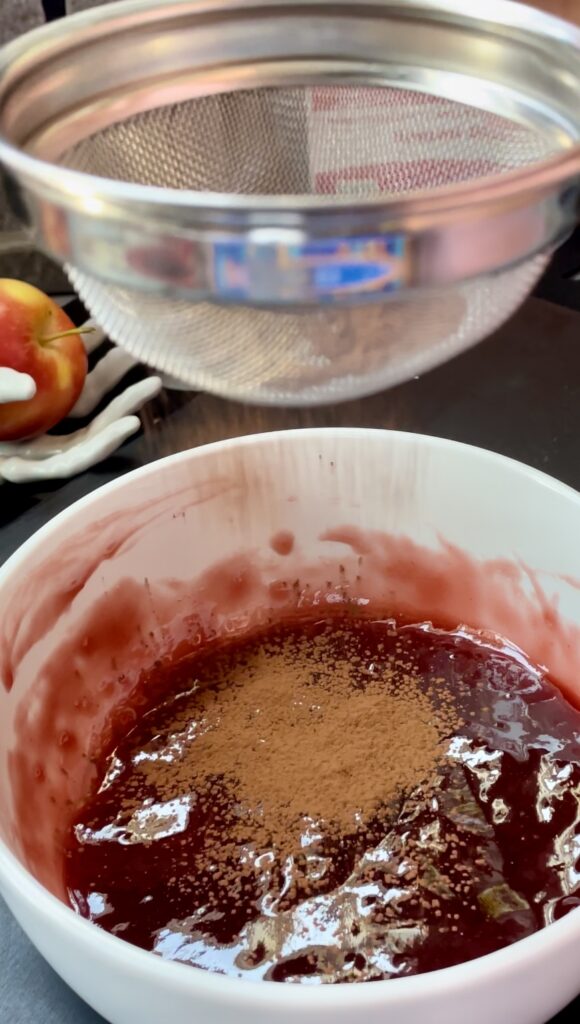
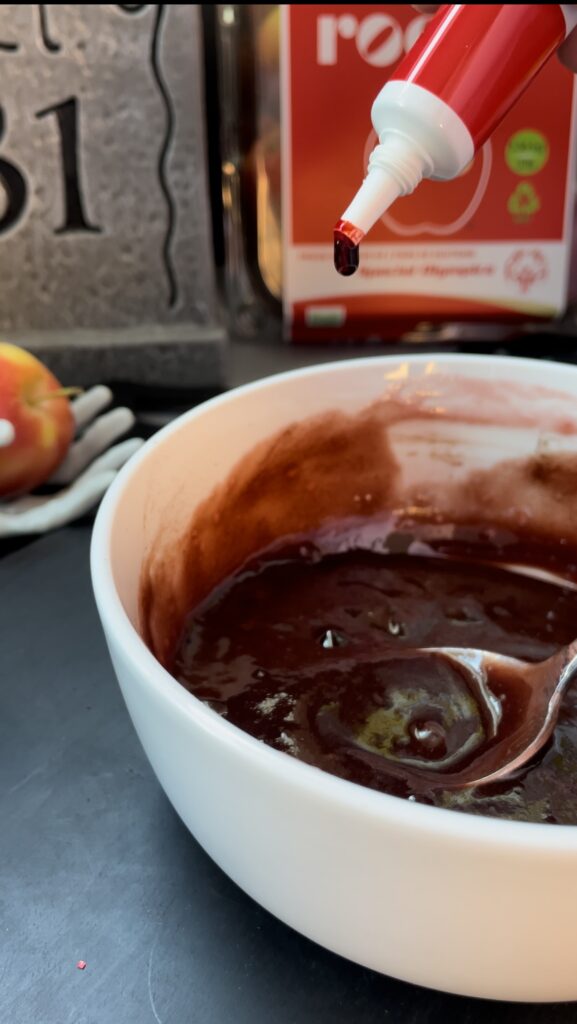
While the white chocolate shells are curing, combine your strained seedless raspberry preserves or raspberry coulis with the fresh lemon juice and a touch of dark cocoa powder in a small bowl. Stir vigorously until completely smooth.
👨🍳 Chef’s Tip: Start with 1 teaspoon of cocoa powder, stir it through completely, and look at the color. The cocoa powder is a secret chef’s trick—it deepens the color from a bright pinkish-red to a thick, realistic, rich dark crimson. Taste it as you go, and if it gets slightly too thick, thin it back out with an extra drop of lemon juice.
Step 8: Apply the Splatter Drips
Once your white chocolate shells are fully cured, use a clean medicine syringe, a small spoon, or a piping bag to carefully drizzle the glossy raspberry blood over the crown of each apple right around the stick. Let it naturally cascade down the stark white sides in dramatic, dripping streaks. Serve immediately on a dark platter for maximum spooky effect!
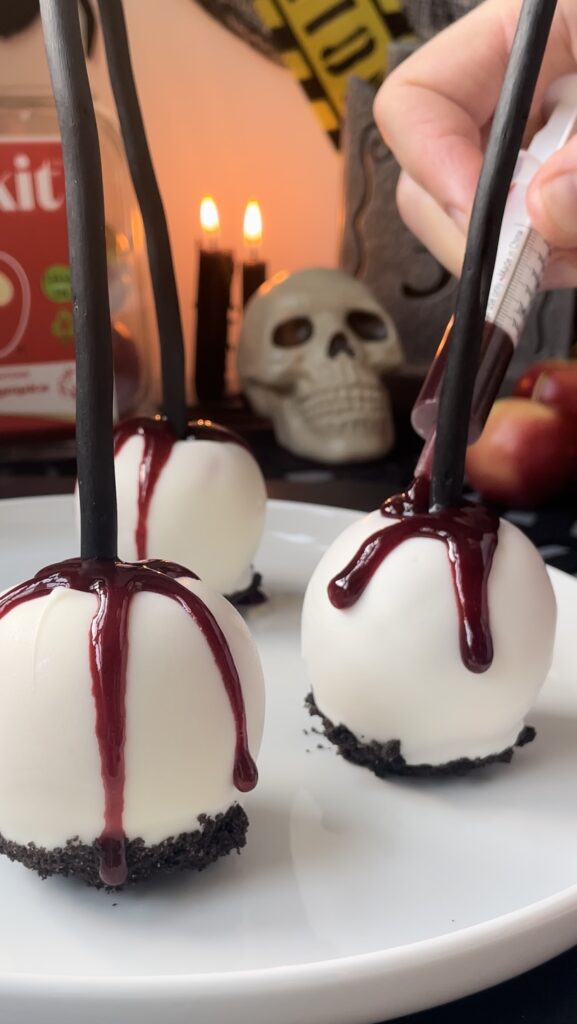
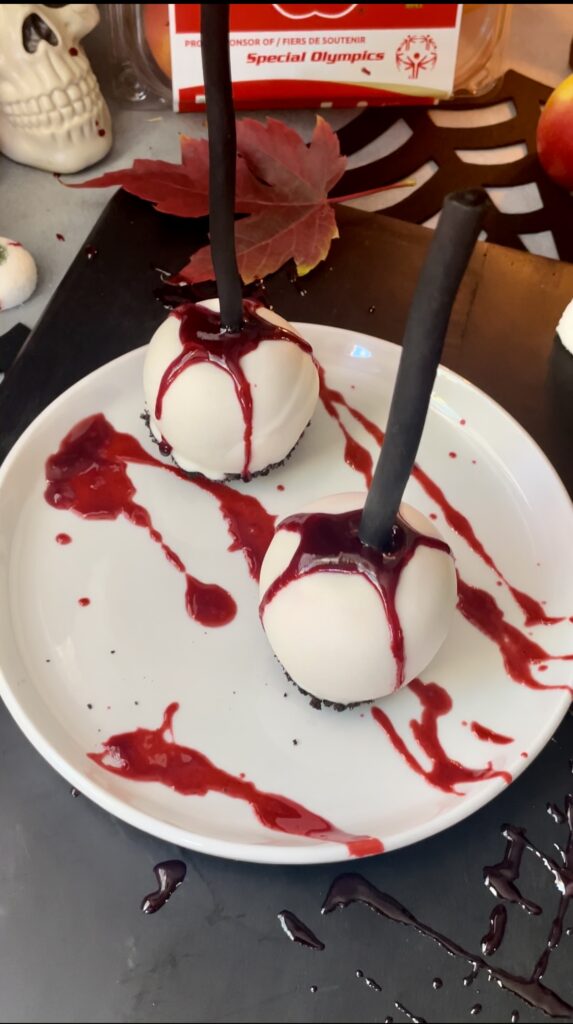
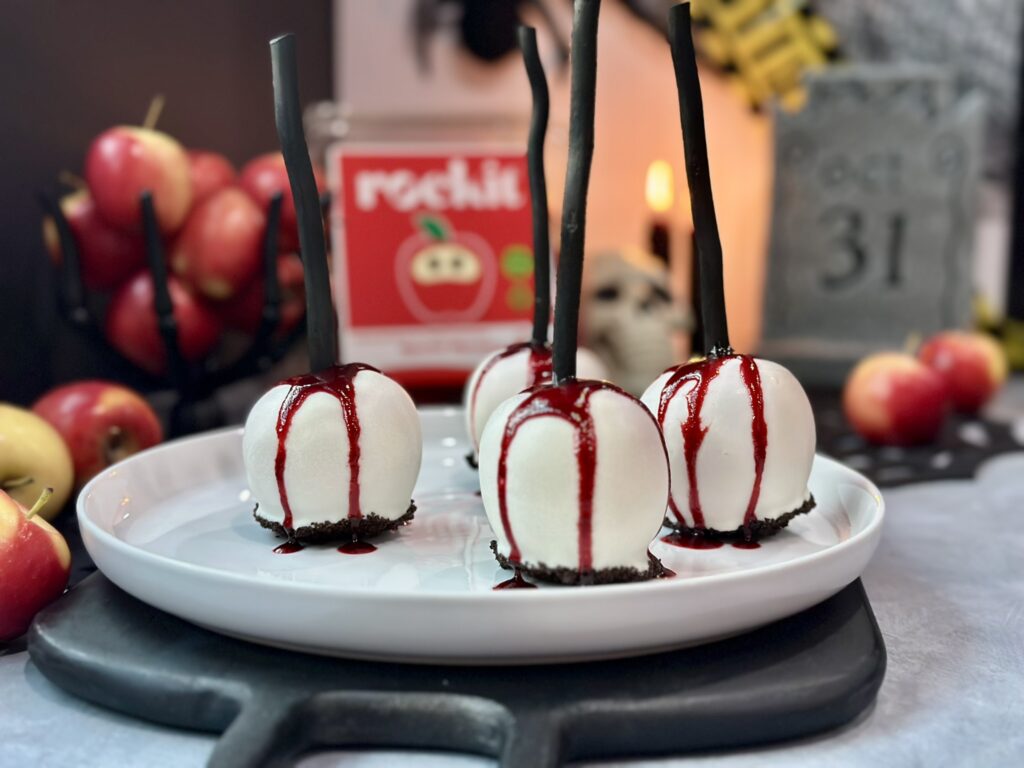
There you have it, my little ghouls! The ultimate, show-stopping Gothic Bleeding White Chocolate Candy Apples that taste even better than they look. The tart snap of the miniature fruit completely balances the rich sweetness of the chocolate shell, making every single bite a perfect mix of spooky and delicious.
If you make these for your own Halloween bash, make sure to tag me on social media so I can see your beautiful, bloody creations! Hit that save button, subscribe below so you never miss a viral recipe, and let’s cook something unforgettable!
Happy haunting, and safe cooking!
~Chef Jen ❤️
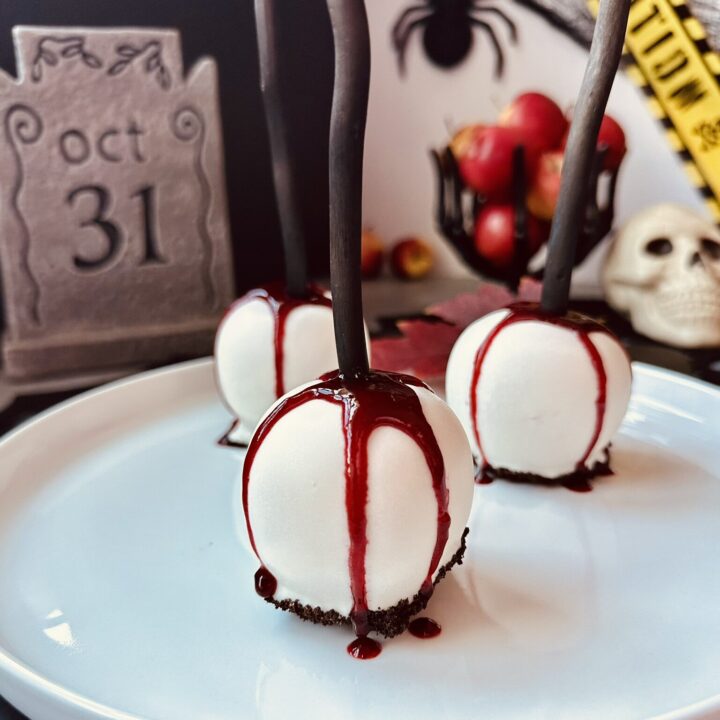
Gothic Bleeding White Chocolate Candy Apples
The original Halloween bleeding white chocolate candy apple recipe. Naturally snack-sized fruit coated in a smooth white chocolate shell, a dark chocolate cookie crumb base, and a tart, slow dripping raspberry chocolate edible blood drizzle.
Ingredients
- The Ghostly Apples & Base:
- 16 Miniature snack-sized apples (like Rockit Apples)
- 24 oz Almond Bark/ White Chocolate Baking Block (I used Great Value Brand as it must have palm oil in it)
- 1 to 2 drops Avocado oil
- ¾ package Oreo cookies (fillings removed & crushed) *I used gluten free ones
- 16 candy apple sticks or popsicle sticks
- The Crimson Raspberry Blood Drizzle:
- ½ cup Raspberry coulis (or strained seedless raspberry preserves)
- 1 to 2 tsp Unsweetened cocoa powder (sifted; start with 1tsp)
- ¼ to ½ tsp Fresh lemon juice (adjust to balance consistency for color and slow-drip texture)
Instructions
- Clean & De-Wax: Submerge the 16 mini apples in hot water for 5 to 10 seconds. Rub firmly with a paper towel to strip away the wax layer, pop off the stems, and let dry completely to room temperature.
- Prep the Soil: Scrape the cream out of the Oreos and discard. Crush the cookie halves in a Ziploc bag with a rolling pin until they reach a gritty, sand-like gravel texture, then pour onto a plate.
- Secure the Sticks: Insert your sticks straight down into the center stem cavities. Firmly dab away any raw apple juices that escape from the hole using a paper towel.
- Melt the Coating: Chop the white almond bark into even pieces and melt in a double boiler over gently simmering water. Once completely smooth, remove from heat and stir in 1 to 2 drops of avocado oil.
- Dip the Apples: Tilt your bowl to pool the white chocolate. Submerge an apple to coat it completely up to the stick, lift straight up, and spin gently in mid-air to let the excess drip off.
- Coat with Soil: While the chocolate is wet, immediately set the bottom third of the apple into the crushed cookies. Leave it undisturbed in the crumbs for a minute to set, then move to a parchment-lined tray to harden for 30 minutes.
- Mix the Blood: In a small bowl, vigorously stir together the raspberry coulis (or preserves) and lemon juice. Sift in 1 teaspoon of cocoa powder and mix thoroughly, adjusting with a touch more cocoa or lemon juice to achieve a slow-drip texture.
- Drizzle & Splatter: Use a spoon or clean syringe to drizzle the red blood syrup over the crown of each apple so it cascades down the sides. Splatter any extra blood across your serving platter for dramatic effect!
Notes
Please read blog post for all the tips and techniques. This is a simple recipe but only if you follow my guidance so the white chocolate coats properly & looks great!
Nutrition Information:
Yield: 16 Serving Size: 1Amount Per Serving: Calories: 210Total Fat: 9g
Nutritional values provided are automated estimations only and can vary based on portion precision, preparation techniques, ingredient freshness, and specific commercial brands used. This recipe is intended for informational and entertainment purposes only. I am a home cook and culinary graduate sharing my personal recipes, not a registered dietitian or certified nutritionist, and this information should not be taken as professional medical or health advice.